
Density Curriculum
Section 1—Lesson 1: How Can Objects of the Same Volume Differ in Mass?
Lesson Plan
Materials
- Equal-sized aluminum and copper cylinders
- Individual white boards and markers for each student. (You could substitute paper and pencils, but the white boards work well for revising ideas.)
- Balance or scale (optional)
Prep Step
- Review the lesson plan, background information, and understanding goals.
- Gather materials.
Note to Teacher: The illustrations in the examples (Student Models Comparing Two Cylinders) use a brass cylinder instead of a copper one. This is because some teachers have found brass easier to obtain than copper. However, brass is an alloy of copper and zinc, not a pure substance like aluminum. An alloy is a substance composed of two or more metals. When students begin analyzing the cylinders on the atomic level in later lessons, it can be simpler to model a pure substance rather than an alloy.
Analyze Thinking
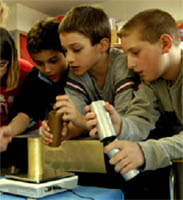
Note to Teacher: If you have enough materials for students to do the activity in small groups, this is preferable, because students will be able to feel the differences in mass.
Step 1: Unpacking Current Ideas: Comparing Two Cylinders with the Same Volume but Different Mass
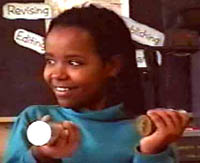
Show the students two large cylinders of the same volume, but different materials, for instance, aluminum and copper. Say, "Here I have two cylinders. What do you notice about them?" Then hand the cylinders to a student and ask, "What observations can you make?"
Have students volunteer their ideas.
If students begin making interpretations, ask them to stick to observations. Do they know the difference? An observation is a description of what you see or perceive. An interpretation explains or tells the meaning of something.
 © Annenberg Media |
Make sure that they notice that the objects are the same size and shape, therefore they have the same volume. This means that they take up the same amount of space. Have some students take a set, one in each hand, and tell them to look at the objects, feel them, and make any observations they can. As the students take the cylinders, notice how much their arms drop with the mass of the copper one and whether their other arm (with the aluminum cylinder) goes up. They should notice that they have different felt weight or mass. An option is to weigh the cylinders on a scale or compare them on a balance. Pass the cylinders around so everyone gets to hold and compare them.
Ask your students to think about what is going on here. Pass out small white boards and markers and ask them to draw a diagram (or models, which you will talk more about later) on the white board that explains how two objects that take up the same amount of space can have such different weights.
 © Annenberg Media |
Explain to your students that while they are drawing, they should think about what they might see if they could zoom in to what is happening on a microscopic level. Their diagram should show each material (copper and aluminum) to compare them (see Student Models Comparing Two Cylinders).
It is also important to remember that science drawings are different from ones that students make in art class. Here students want to draw enough to make their ideas clear and if they draw details, they should be details that help someone else understand their ideas. It is not important to draw lots of extra things (like the table that the cylinders are sitting on or the background, etc.).
Give the students 5-10 minutes to draw their models. Ask them to draw both objects and illustrate why one has more mass than the other. The point of this activity is to help them get in touch with their current thinking so that they (and you) can reflect upon it and help them revise it so that they have more powerful models for explaining what is going on.
Circulate while they are drawing and talk with students about their ideas. If students use the word "density," ask them what they think it means. Get a sense of what kinds of models the students are drawing to help you orient the discussion that follows.
CHECKING IN
After about half of the time has passed, ask the students to stop for a few moments and ask themselves the following questions:
1) Am I using my drawings to really THINK about what each concept means? (Instead of just drawing what someone else has drawn or the first thing that comes to mind?)
2) Am I PUSHING my thinking to explore the concepts deeply? (If a concept is hard, and not giving up but trying to think it through?)
3) Am I working "minds-on"—actively thinking about the concepts as I draw and trying to create a drawing that explains something about how the concepts are different?
Step 2: Discussing and Analyzing Students' Current Models
Once students have drawn their models, go around the room and have each student share what they drew and why. Having each student share is a good way to encourage students to participate more fully and takes away the social aspects of volunteering one's ideas.
Explain that scientists use models in science. Models are a way to help you think about a problem. They are "tools for thinking."
Discuss what works about each model. Draw out its good points. If there are drawbacks, mention those too, but put a positive spin on each model to encourage students in their sharing. As much as possible, encourage the students to talk to each other rather than directing all of their ideas to you.
What kinds of things might you say about different models?
- Draw attention to what the model does to explain the differences in felt weight: for instance there might be more dots drawn in one of the cylinders and fewer in the other.
- Notice attention to scientific detail.
- Consider whether the model does a good job showing what might be going on to make one cylinder weigh more than another.
- Comment on whether the model is easy to interpret.
Some of the models will show air or suggest that the object might be hollow. Acknowledge that this is one possible explanation for the difference between the cylinders. Ask,
- Are there other explanations?
- Is there a way to explain it if the cylinders are solid?
- Can something that is light be solid, and not be hollow?
Contrast models that do show the cylinders as hollow with ones that do not.
As the students are talking about their ideas, collect questions or issues that arise and list them on chart paper or the corner of the board. For instance, one student might refer to space in between the dots in their model, and another student might refer to air.
Step 3: Introducing the Concept of Density
Ask the students if they know a word to describe the differences between the two cylinders. If not, introduce the word "density." Explain that density is a word that scientists use to help them talk about the difference between the cylinders. They call one more dense (it has more felt weight, weight on earth, or mass) and one less dense. The less dense one feels lighter. Tell them that density describes the amount of matter in a given amount of space. Explain that the word isn't as important as the sense you make of it, so in the next class, you will show them more models to help them to visualize density.
Students often confuse more and less dense. Explain that the more matter is in a given space, the more dense or denser the material will be. This understanding will be reinforced in later lessons.
Review, Extend, Apply
Step 4: Reflecting on the Activity
Ask the students to consider why we gave them the kinds of objects that we did.
- What made it possible to realize that something was going on?
- What did we keep the same? (size, shape, volume) ...and why?
- What did we vary? (kinds of material, mass) ...and why?
See if they can come to the realization that by holding one of the variables constant, you can learn about the other.