
Density Curriculum
Section 2—Lesson 6: Do Liquids Have Density?
Lesson Plan
Materials
For each group of 2-4 students:
- 1 10 ml graduated cylinder
- 4 Eyedroppers
- 4 jars of 4 liquids (vegetable oil, rubbing alcohol, salt water, and dish soap)
- 1 Large jar
- 1 Triple beam balance
- Paper towels
- Journals
- Finding the Density of Water sheet (PDF 83 KB)
- Finding the Density of Common Liquids sheet (PDF 96 KB)
Prep Step
- Review the lesson plan, background information, and understanding goals.
- Gather materials.
- Photocopy the sheets: Finding the Density of Water and Finding the Density of Common Liquids.
Analyze Thinking
Step 1: Do Liquids Have Density?
Explain to the students that so far, we have been focusing on the density of solids. Pose the question: "Do liquids have density?"
Collect arguments in support of liquids having density and arguments against liquids having density. Ask students to offer their reasoning and any evidence that they can think of for their arguments. They may want to draw some models.
Have students think back to what they know about the nature of matter. Ask them to draw a model of a solid and a liquid in their journals to help them think about the question. Invite a few students to put their models on the board (see Student Models of Solids and Student Models of Liquids).
Have the students consider the following questions:
- Do liquids take up space? [Yes]
- Do liquids have mass? [Yes]
- Then do liquids have density? [Yes]
Discuss students' questions about liquids and density. They may find it hard to believe that there can be differences in density between liquids because liquids are not all that compressible. Think of a bowl full of marbles. They roll all over each other, but there isn't much difference in the spaces between them. In the next section, when students learn about atomic mass, they will have another way to think about sources of density besides spacing between molecules. For now, ask them to consider what would happen if they melted down the cylinders that we looked at in Lesson 1. Think about how liquid aluminum might be different from liquid copper. For those students who still are not convinced, tell them that they will learn more about the causes of density in the next section and this should help them understand how there can be differences in density between different liquids.
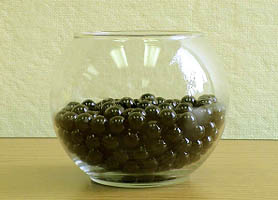 A bowl of marbles provides a nice model of the molecules in a liquid. The marbles can move around in relation to each other and are close to one another, so their molecular forces impact one another. |
Explore Outcomes
Step 2: Demonstrating How to Find the Density of a Liquid: Water
Explain that you are going to demonstrate how to find the density of a liquid, in this case water. Students should pay careful attention because they will be finding the density of some other liquids next. If you would like the students to gain hands-on, guided practice, pass out the sheet, Finding the Density of Water and have them do each step along with you.
Weigh the empty 10 ml graduated cylinder and record its mass. Next, fill the graduated cylinder with various amounts of water, recording the volume and weighing each volume before filling the cylinder again. Record the mass of each volume. Be sure to subtract the mass of the graduated cylinder from the totals.
For example, find the mass of 2 ml, 5 ml, 7 ml, and 10 ml of water. Then find the density of water using the formula D = M/V. Discuss the fact that regardless of the amount of water, the density of water is consistently 1 g/ml.
Finding the Density of Other Common Liquids
Divide the class into groups of approximately two to four students. Pass out to each group a 10 ml graduated cylinder, a triple beam balance, a few paper towels, small jars filled with of one of each of the following: vegetable oil, rubbing alcohol, salt water, and dish soap. Pass out the sheet, Finding the Density of Common Liquids.
The students should follow the procedure they used with the water:
- Weigh the empty 10 ml graduated cylinder and record its mass.
- Fill the graduated cylinder with 10 ml of one of the liquids (vegetable oil, rubbing alcohol, salt water and dish soap) and then check its mass. Remember to subtract the weight of the graduated cylinder from the total.
- Record the mass.
- Using the formula D=M/V, find the density of each liquid.
After students finish with one liquid, they should trade with another group until they have found the density for all four liquids. Circulate while the students are working to assess how they are doing at figuring out the densities of the different liquids. Make note of any difficulties figuring out mass, volume, or density and offer assistance to those who need it.
Step 4: Discussing Students' Findings
Ask the students what they found for the density of each liquid. Which liquid is the most dense? Which is the least dense?
Review, Extend, Apply
Step 5: Making Connections to the Real World
Ask the students to think about the different liquids that they tested.
- Do the findings fit with their expectations?
- Based on what they learned, can they make any predictions about other everyday liquids?
- What about liquids like milk, soda, and syrup? Do they have density? (Yes)
- Do they think that these would be more dense or less dense than the other liquids that they tested? Why or why not?
- How could they find out?